Digital Productivity, Online planners, Planners
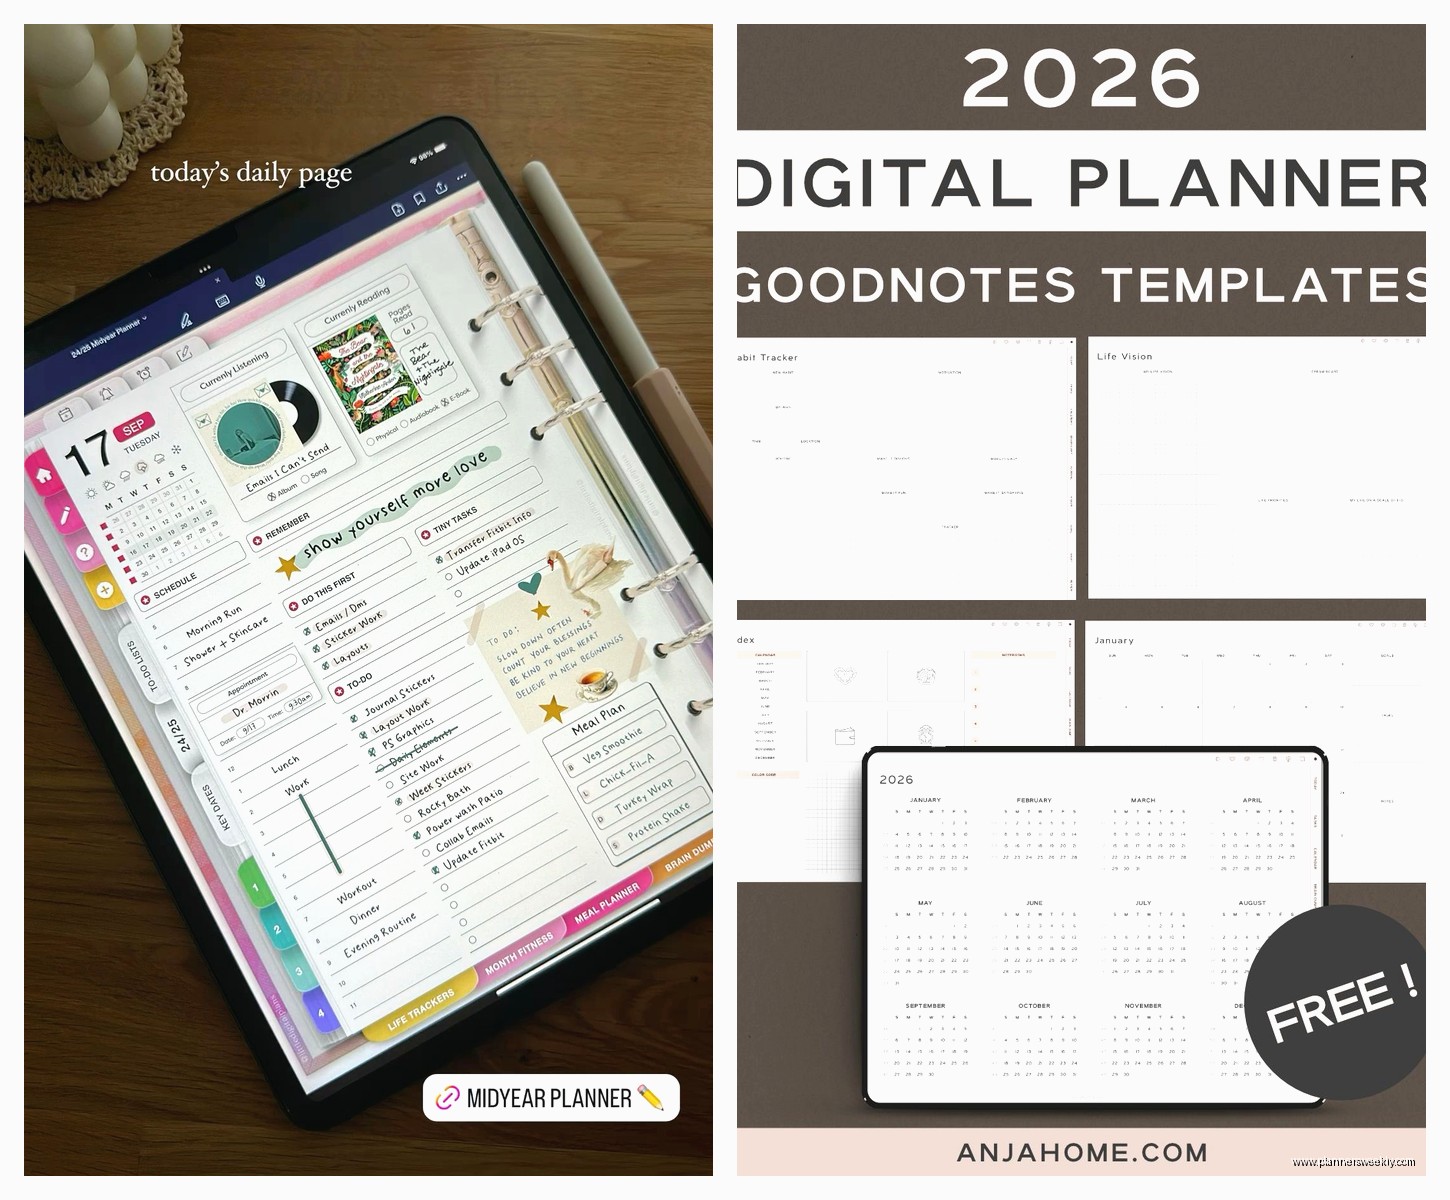
GoodNotes Digital Planner: Templates & Setup Guide
Mar
Okay so I just spent like three hours this weekend setting up different GoodNotes planners because my usual paper system wasn’t working with all the travel I’m doing, and here’s what I actually figured out.
First thing – you gotta understand that GoodNotes is just the app, right? It’s like $9.99 and honestly just buy it because the free version is basically useless for actual planning. The templates are what you’re really hunting for, and that’s where it gets messy because there are literally thousands of options on Etsy and everyone’s trying to sell you their “ultimate” planner.
The Whole Template Situation
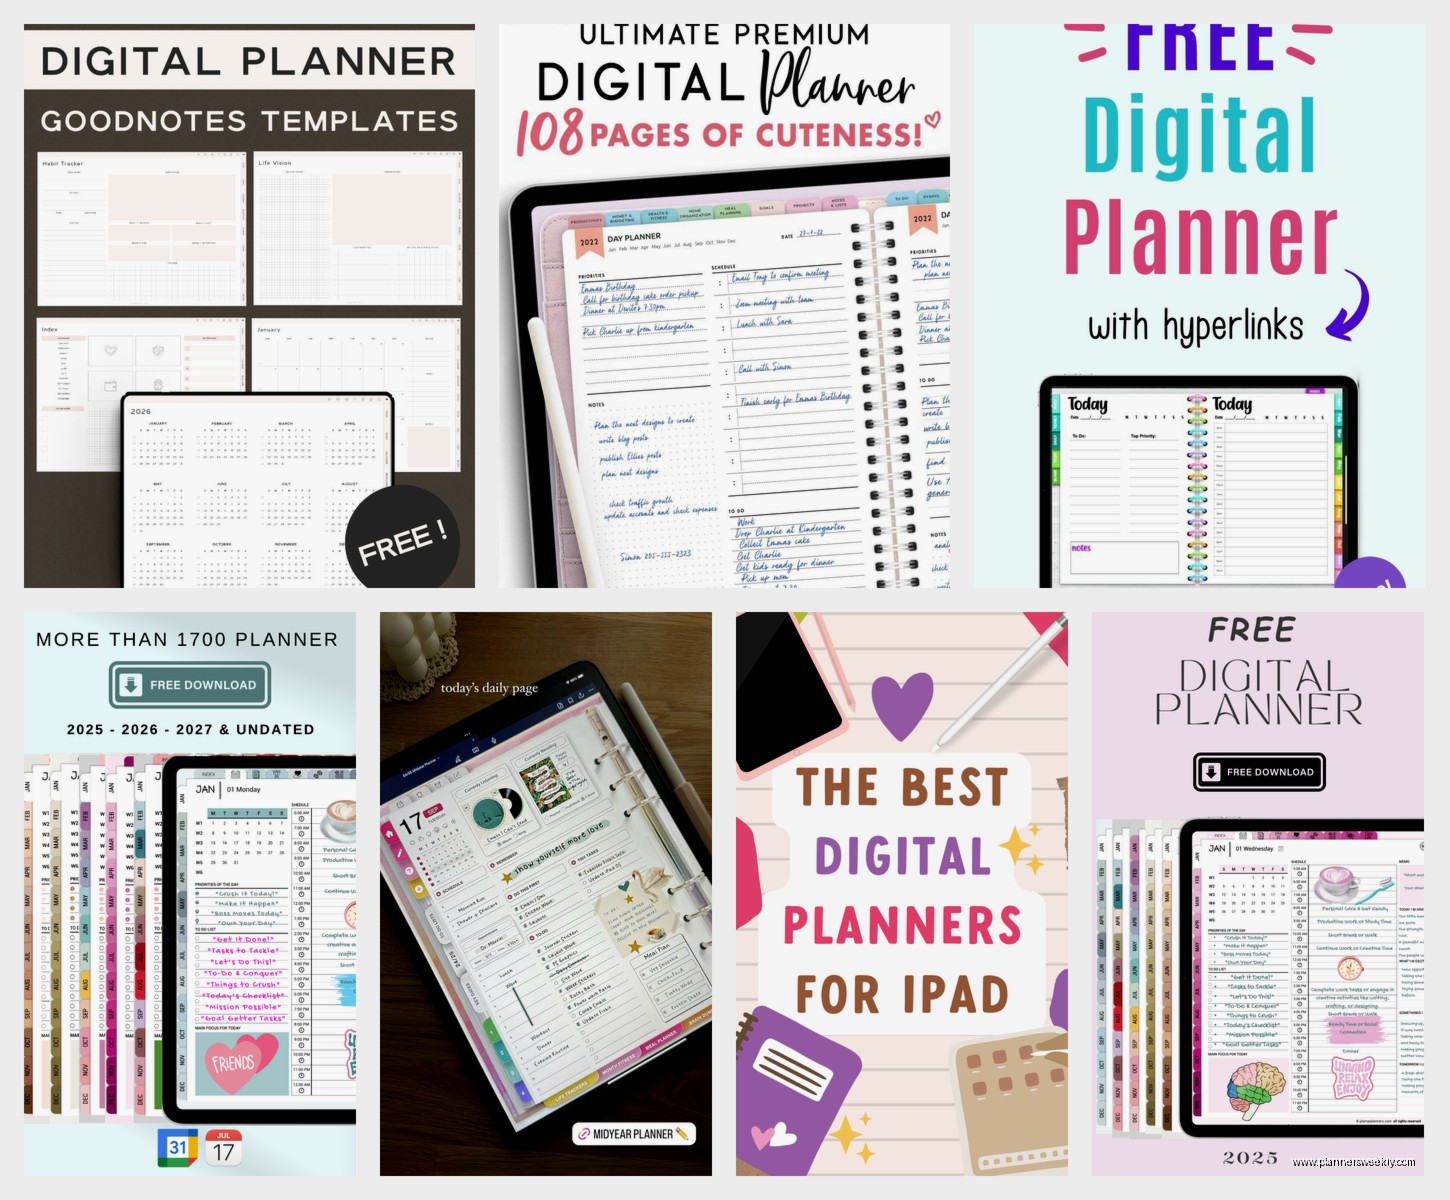
So templates come in PDF format usually, and you’re gonna see prices from like $3 to $30. I’ve tested probably fifteen different ones at this point and the price doesn’t always match quality which is annoying. The expensive ones often have more pages and hyperlinks, but sometimes you just need basic pages that work.
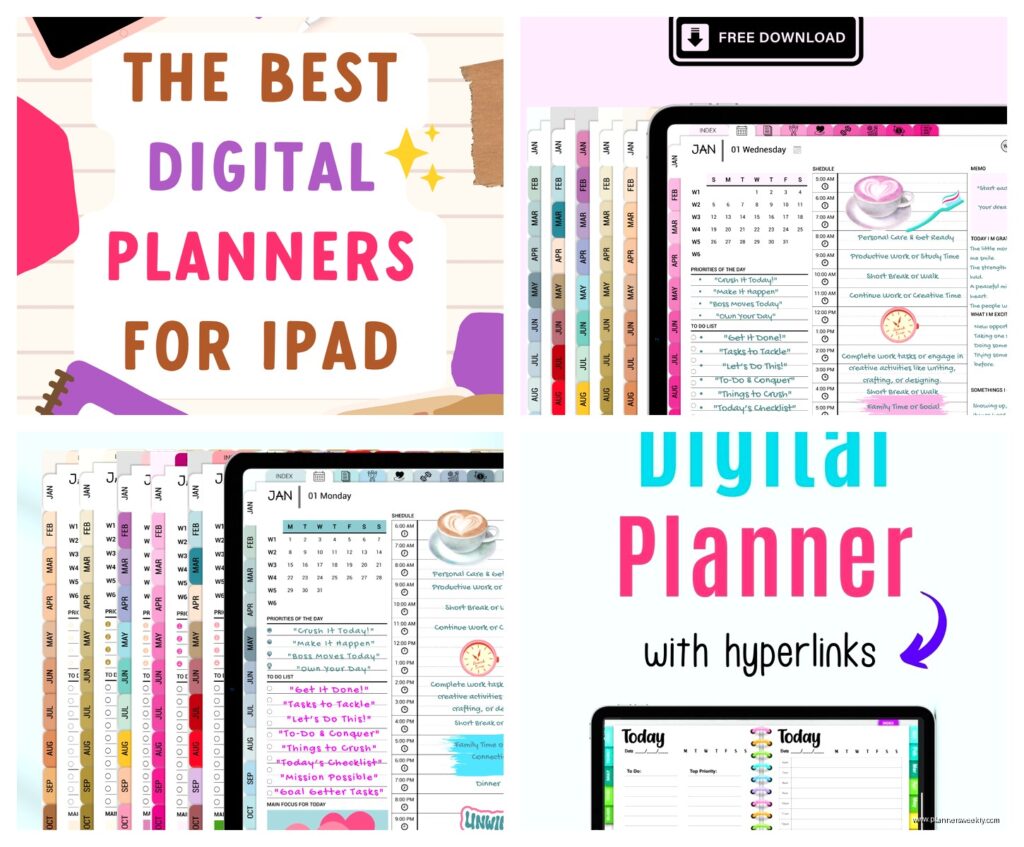
What you actually want to look for: hyperlinked tabs. This is the thing that makes digital planning not completely frustrating. If you have to manually swipe through 400 pages to find your monthly view, you’re gonna stop using it within a week. Trust me I watched my cat knock over my coffee while trying to navigate a non-hyperlinked planner and just gave up on that one entirely.
Dated vs Undated Templates
This is the first real decision. Dated planners have all the dates already filled in – so like “January 2024” is already there with all the correct days. Undated planners are blank and you fill in the dates yourself.
I thought I wanted dated because it seemed easier but actually undated is better for most people. Here’s why – if you don’t use it for two weeks because life happened, you don’t have this guilt of empty dated pages staring at you. With undated you just fill in today’s date and keep going.
The only exception is if you’re buying this specifically for 2024 or 2025 and you KNOW you’ll use it consistently. Then dated saves you time.
Actually Setting This Thing Up
Okay so you bought GoodNotes and you found a template you like on Etsy or wherever. The file comes as a PDF. Here’s what you do:
Open the email on your iPad (I’m assuming iPad here because GoodNotes on iPhone is too small for actual planning). Download the PDF. It’ll probably go to your Files app. Then open GoodNotes and tap the plus sign, then Import, then find your PDF in Files.
Wait I forgot to mention – make sure you’re importing it as a new document, not adding pages to an existing notebook. I messed this up the first time and added 300 planner pages to my work meeting notes which was a disaster.
The Cover and Tabs Setup
Most good templates come with a cover page and a tabs page. The tabs page is crucial – it’s usually the second page and has buttons that link to different sections. Like “Monthly View” or “Weekly Spread” or “Goals.”
To test if the hyperlinks work, just tap them. If tapping a tab takes you to that section, you’re good. If nothing happens, the template wasn’t hyperlinked properly and honestly I’d return it because manually navigating is not sustainable.
Some templates have a “back to tabs” button on every page which is chef’s kiss perfect. Others make you use the thumbnail view to get back which is fine but slower.
Paper Feel and Pen Settings
This is gonna sound weird but the paper texture matters way more than I expected. GoodNotes has different paper templates – blank, lined, dotted, etc. But your planner PDF already has its background built in, so you can’t really change it.
What you CAN do is adjust your pen settings to work with whatever background the planner has. I use the ballpoint pen tool set to about 0.3-0.5 thickness for most writing. Fountain pen looks pretty but it’s slower to write with because of the rendering.
Oh and another thing – if you’re someone who writes small, get a matte screen protector. The regular glass screen is too slippery and your handwriting will look drunk. I got the Paperlike brand one and it actually does make it feel more like paper, though it makes your screen look slightly grainy.
Pen Colors That Actually Work
The default GoodNotes colors are fine but I customized mine and it made a huge difference. For a planner you want:
- Black or dark gray for main writing – not pure black because it’s harsh, I use the dark gray
- One bright color for highlights or important stuff – I use the orange
- A muted color for less important notes – I do a light blue
- Red for deadlines because obviously
You can save custom colors by tapping the color wheel and adjusting the hex code. I spent way too long on this while my dog was barking to go out, but now my colors are perfect so worth it.
Which Template Style Actually Works
I’ve tested vertical weekly layouts, horizontal weekly layouts, daily pages, and the hourly schedule types. Here’s the real talk:
Vertical weekly spreads are the most popular and honestly they work for most people. You get the whole week on one page, each day is a column. Good for seeing your week at a glance. Bad if you need a lot of space per day.
Horizontal weekly has each day as a row. I don’t love this one because the days feel cramped width-wise.
Daily pages with one full page per day – only worth it if you actually have a LOT to plan each day. Like if you’re a student with multiple classes and assignments, or you’re managing complex projects. For normal life this is overkill and you’ll get tired of navigating to new pages constantly.
Hourly schedules are great in theory but I found them too restrictive. Not everything fits in hour blocks and then you’re squishing stuff in margins.
The Minimalist vs Decorated Debate
There are super decorated planners with flowers and colors and quotes everywhere, and there are minimal ones that are basically just lines and boxes.
I wanted to like the decorated ones because they’re pretty, but they’re actually distracting when you’re trying to quickly write something down. Plus the decorations eat up space that could be used for actual content.
Go minimal. You can always add stickers or drawings yourself if you want decoration, but you can’t remove built-in graphics.
Must-Have Sections
Okay so beyond the weekly pages, these are the sections that actually get used:
Monthly calendar view – non-negotiable, you need this for seeing the big picture. Should be a traditional calendar grid.
Goals or intentions pages – I was skeptical but I actually use mine. Just one page per month where you write 3-5 things you want to focus on.
Notes section – blank pages for random stuff. I use mine for book notes, gift ideas, random thoughts during meetings.
Project planning pages – if you have ongoing projects. Some planners call this “brain dump” pages.
What you DON’T need: habit trackers (be honest you won’t maintain it), gratitude journals (same), meal planning pages (just use a notes app), budget pages (use an actual budget app).
Hyperlink Customization
Here’s something I figured out last week – you can ADD your own hyperlinks to any PDF in GoodNotes. So if your template doesn’t have enough links, or you want to link to specific pages, you can do it yourself.
Tap the three dots menu, select “Add Link,” then draw a box where you want the clickable area, then choose which page it should link to. This is huge for customizing templates.
I added links from my weekly pages back to my monthly view because the template didn’t have them, and now navigation is so much smoother.
Actual Daily Use Workflow
This is what actually works after testing different approaches:
Morning – open to weekly view, add any new tasks or appointments that came up. I do this with coffee while half-watching whatever’s on TV.
Throughout day – quick capture on weekly page. Don’t overthink it, just scribble it down. You can make it neat later if you want but probably you won’t and that’s fine.
End of week – review weekly page, migrate unfinished stuff to next week, check monthly goals.
That’s it. Don’t try to make it more complicated with elaborate systems. The best planner is the one you actually use, and you’ll actually use it if it’s quick and easy.
The Syncing Thing
GoodNotes syncs through iCloud automatically if you have it set up. This means your planner is accessible on your iPhone and Mac too, not just iPad. The Mac version is actually pretty good for viewing and typing text, though handwriting on Mac with a mouse is obviously terrible.
I mostly plan on iPad but sometimes I’ll open it on my phone to quickly check what’s coming up. The sync is fast, like within seconds usually.
Common Setup Mistakes
Don’t import the same template multiple times thinking you need separate files for different months. One planner file should have everything – the templates are designed with enough pages for a full year usually.
Don’t try to use multiple planner templates at once. Pick one and commit for at least a month. Switching between different layouts constantly is confusing and you’ll waste time figuring out where stuff is.
Don’t go crazy with the lasso tool trying to make everything perfect. Digital planning isn’t about perfection, it’s about function. If your handwriting is messy, who cares, you can read it.
Do make a backup occasionally. I export my planner as a PDF once a month and save it to Google Drive just in case. GoodNotes is reliable but technology fails sometimes.
Free vs Paid Templates Real Talk
There are free templates out there but they’re usually pretty basic. The paid ones on Etsy from established sellers are worth the $10-15 in my opinion because the hyperlinks actually work and the layouts are tested.
Some sellers I’ve had good experiences with – actually you know what, they change all the time and I don’t want to recommend someone who might have different quality next month. Just look for sellers with lots of reviews and check that the preview images show hyperlinked tabs clearly.
Read the reviews specifically for comments about hyperlinks working and pages being the right size for iPad. Some templates are designed for different paper sizes and look weird on iPad screens.
The Apple Pencil Question
You technically can use GoodNotes with your finger but it’s not great. Apple Pencil is basically required. The first gen and second gen both work fine – second gen is nicer because it charges magnetically but first gen does the same actual writing.
There are cheaper styluses but I haven’t found one that works as well. The palm rejection is off and you end up with random marks everywhere.
Oh and get a case with a pencil holder because you will lose that thing constantly otherwise. I’ve lost mine twice already just in my house.
Okay I think that covers the main setup stuff. The key is just to start simple, use it for a week, then adjust what’s not working. Don’t spend three hours setting up the perfect system before you’ve even used it once – that’s procrastination disguised as productivity and I’m definitely not speaking from experience there.