Digital Productivity, Online planners, Planners
Excel Work Schedule Maker: Template Guide & Tutorial
Mar
Okay so I spent like three hours yesterday building work schedules in Excel because one of my clients was losing her mind trying to coordinate her team, and honestly once you get the hang of it, it’s so much easier than those fancy scheduling apps that cost like $50 a month.
Setting Up Your Basic Template Structure
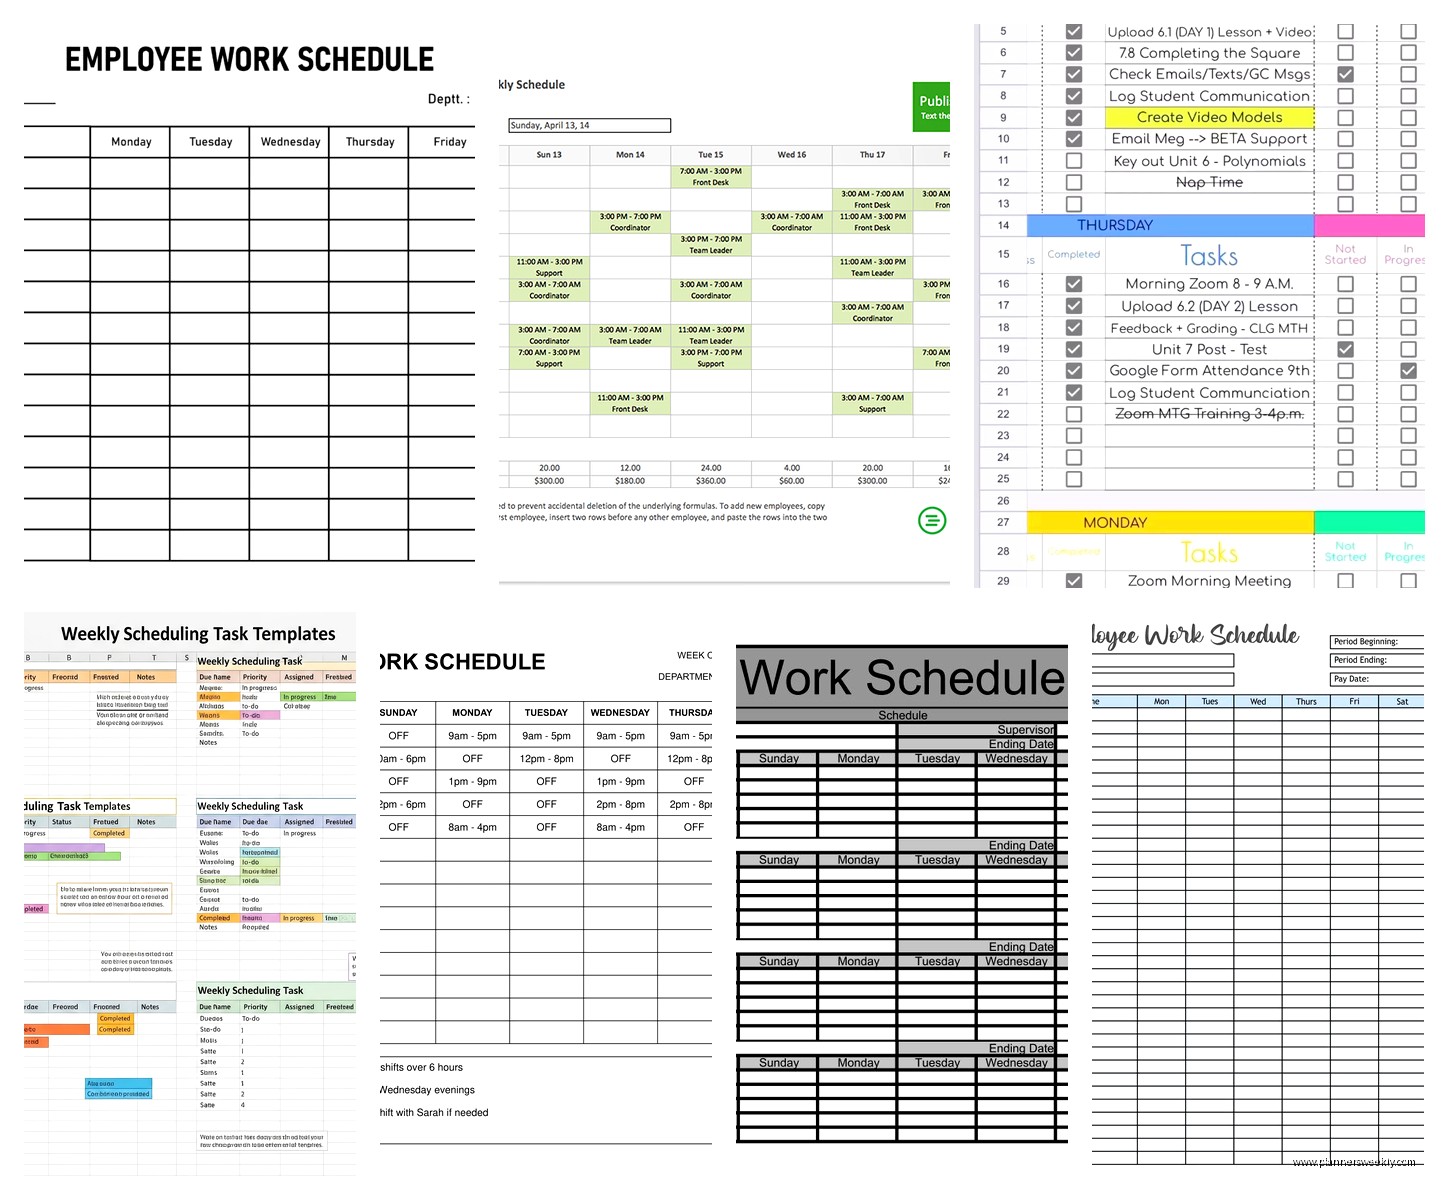
Right so first thing you gotta do is open a blank workbook and think about what you actually need. I usually start with the employee names in column A, then the days of the week across the top row. Super basic but it works. You can get fancy later but like, start simple or you’ll give up halfway through.
For the header row, I do something like this: leave A1 blank, then B1 is Monday, C1 is Tuesday, and so on. Then in A2 I start listing employee names. The thing that always trips people up is they try to make it too complicated right away with shift times and break schedules and honestly just get the skeleton done first.
Quick Cell Formatting Trick
Select your header row and make it bold, maybe add a background color. I always use a light blue because it doesn’t make my eyes hurt after staring at it for an hour. Right-click, format cells, fill tab, pick whatever color doesn’t annoy you. My cat jumped on my keyboard while I was doing this yesterday and somehow made everything bright yellow which was… a choice.
Adding Time Blocks Instead of Just Days
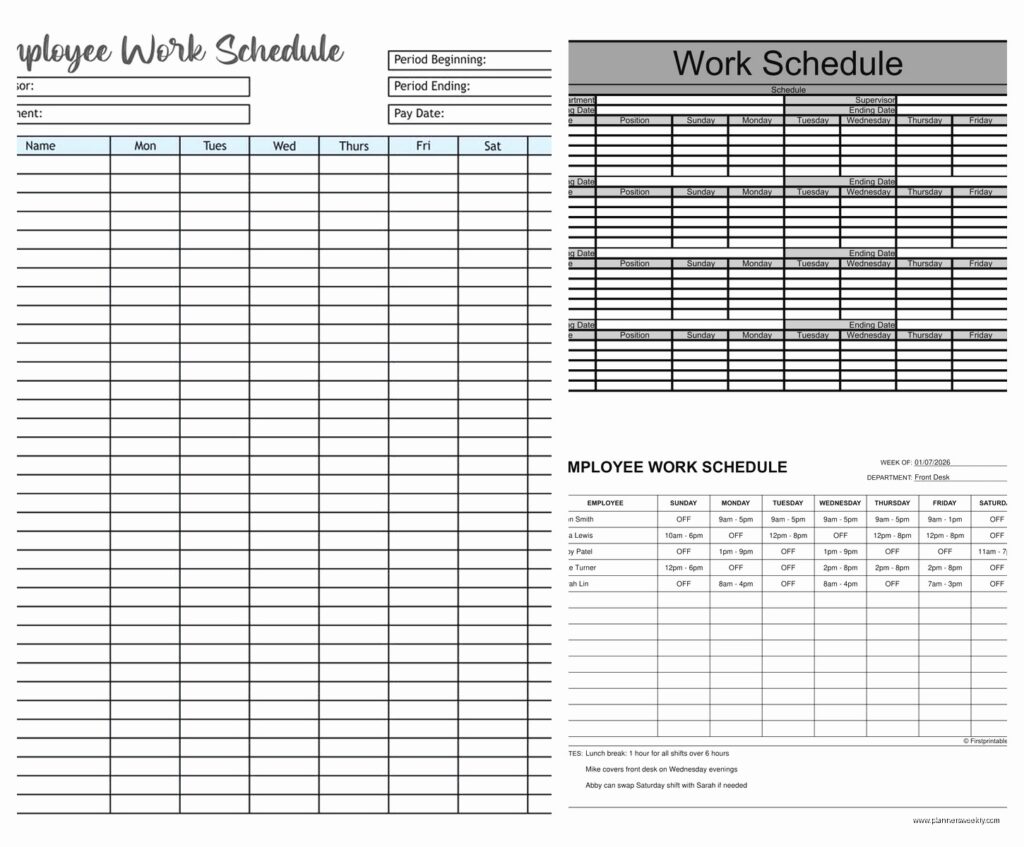
Wait I forgot to mention, if you need actual shift times and not just day assignments, the setup changes a bit. What I do is merge cells across the top for each day, then underneath those merged cells I create columns for different shifts. So like Monday spans across three columns underneath: Morning, Afternoon, Night.
To merge cells, select B1 through D1, right-click, format cells, alignment tab, check merge cells. Then in B2 you’d put “Morning”, C2 gets “Afternoon”, D2 is “Night”. Repeat for each day. This is gonna sound weird but I actually learned this trick from scheduling my own content calendar and just adapted it.
The Time Format Thing That Nobody Explains Right
If you’re putting actual times in like “9:00 AM – 5:00 PM” just type them as text. I know Excel has time formats but unless you’re doing calculations with them, text is way easier. Just type it in quotes or start with an apostrophe if Excel keeps trying to be helpful and converting it to something weird.
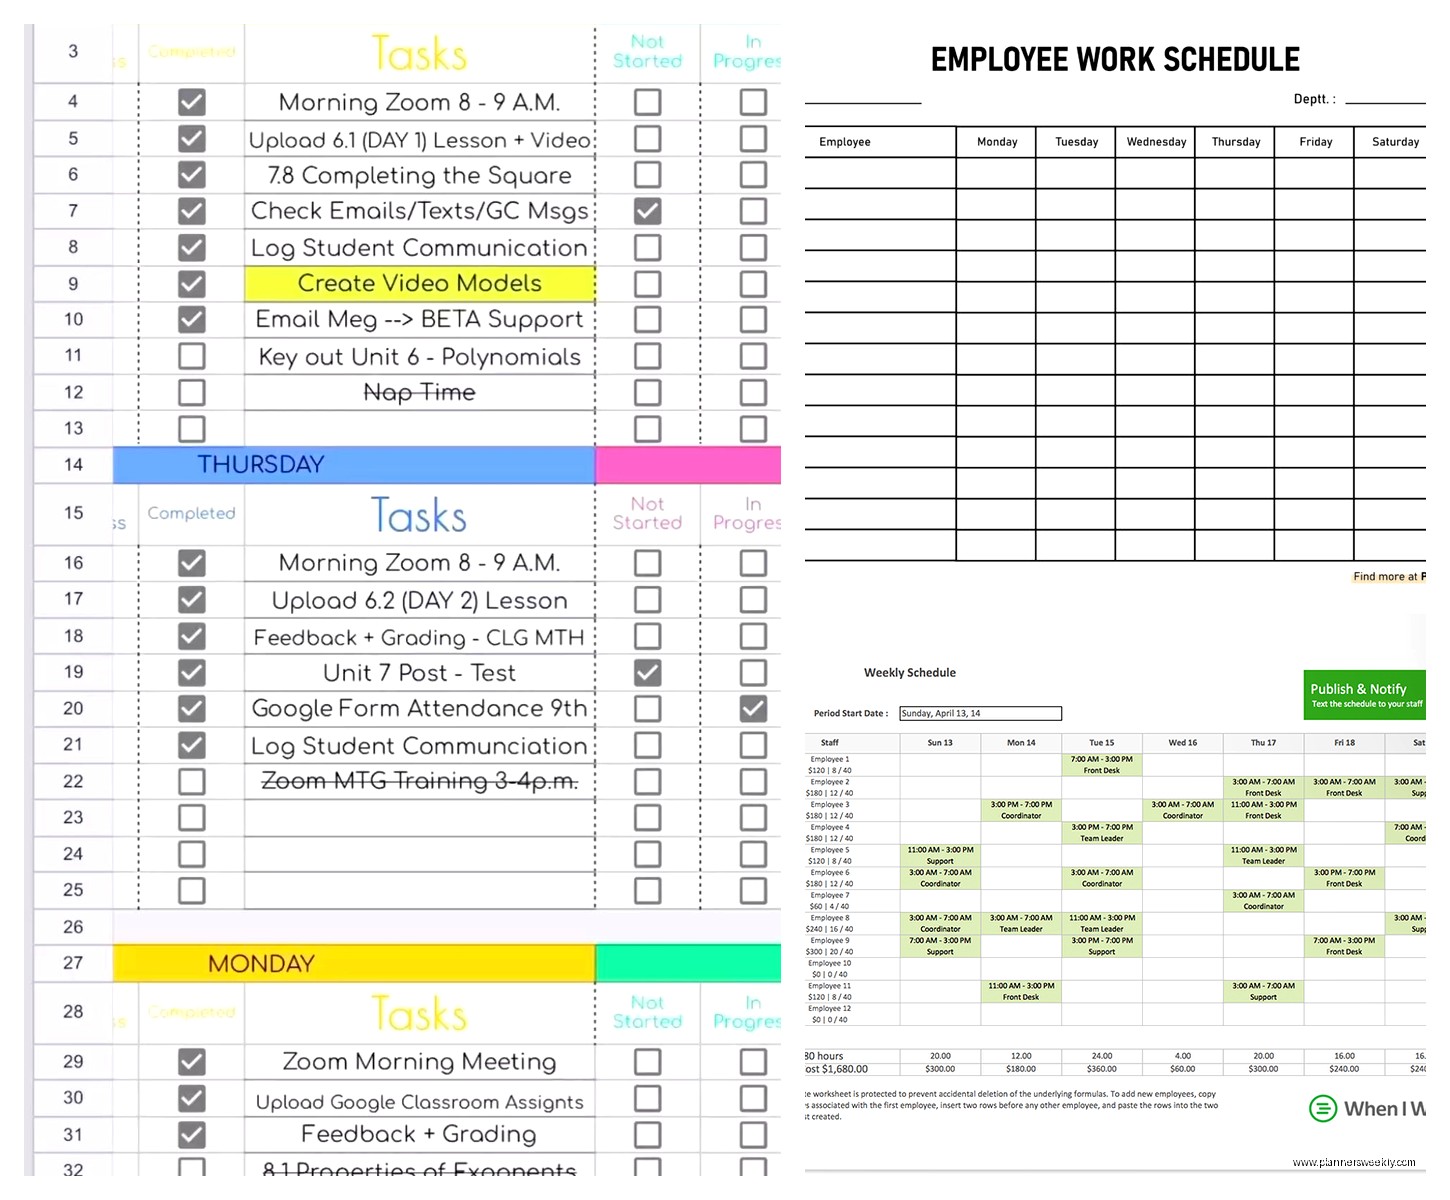
Color Coding for Different Shift Types
This is where it gets actually useful. I use conditional formatting but honestly sometimes I just manually color cells because I’m impatient. Let’s say you want morning shifts in yellow, evening in orange, night shifts in dark blue.
Select the cells where you’ll be putting shift assignments. Go to Home tab, Conditional Formatting, New Rule. Pick “Format only cells that contain” and then under “Format only cells with” choose “Specific Text” and “containing” then type whatever code you use. Like if you type “M” for morning shift, make it yellow.
The problem with this is you gotta set up a rule for each shift type and sometimes I’m just like forget it and manually fill cells. Which is fine for smaller teams. My client has 8 people so manual works totally fine.
Drop-Down Lists Make This So Much Faster
Oh and another thing, data validation for dropdown lists is a game changer. Seriously. Instead of typing “Morning shift” every time, you click and select from a list.
First make a list somewhere of your shift types. I usually do this on a second sheet tab so it doesn’t clutter the main schedule. Like on Sheet2, put your options: Morning, Afternoon, Night, Day Off, whatever you need.
Then back on Sheet1, select all the cells where you’ll be assigning shifts. Go to Data tab, Data Validation, Allow dropdown, pick List, then for Source click the little arrow icon and go select those cells on Sheet2 where you made your list. Now every cell has a dropdown menu.
I literally showed this to someone last week and she looked at me like I’d just performed magic.
Adding Employee Availability Notes
Sometimes you need a notes column for like “can’t work Tuesdays” or “only mornings”. I add this as the last column. Just a regular text column but I make it wider. Double-click the column border to auto-fit or manually drag it wider.
You can also do this with cell comments if you don’t want it visible all the time. Right-click a cell, Insert Comment, type your note. There’ll be a little red triangle showing there’s a comment there.
Formulas That Actually Help
Okay so funny story, I was watching this crime documentary while building a template and got so distracted I accidentally created the most complicated formula for something super simple, but here are the ones that actually matter.
Counting Total Shifts Per Employee
At the end of each row, you probably want to know how many shifts each person is working. Use COUNTA which counts non-empty cells. If your shifts for one employee are in cells B3 through H3, the formula is:
=COUNTA(B3:H3)
This counts any cell that has something in it. Put this in column I or wherever your week ends. You can also use COUNTIF if you want to count specific shift types like how many night shifts someone has.
Highlighting Conflicts or Gaps
This gets trickier but conditional formatting can flag if someone’s scheduled too many days. Like if you want to highlight when someone works more than 5 shifts, select your count column, conditional formatting, highlight cells greater than 5, pick a color.
For finding gaps where nobody’s scheduled, you can use conditional formatting on the shift cells themselves. If a cell is blank, highlight it in red so you know you forgot to schedule that slot.
Making It Print-Friendly
Nobody talks about this but if you’re printing these to post in a breakroom or whatever, you need to set it up right. Page Layout tab, adjust margins, orientation to landscape usually works better.
Set your print area by selecting all the cells you want to print, then Page Layout, Print Area, Set Print Area. This way when someone hits print it doesn’t try to print like 50 blank columns.
Also in Page Setup, go to Sheet tab, check “Rows to repeat at top” and select your header row. This makes the header print on every page if your schedule is long.
Template Variations I’ve Actually Used
For retail or restaurants you probably need multiple employees per shift. Instead of one cell per time slot, I make each day section wider and put multiple names in. Or use multiple rows per time slot.
For office schedules where it’s more about who’s working from home versus in-office, I just use WFH and Office as my dropdown options. Super simple.
There’s also rotating shift schedules which are honestly annoying to set up but once you do it once you can reuse the template forever. You basically create the pattern for one rotation cycle then copy it down.
The Two-Week vs Four-Week Question
I usually do two-week templates because they fit on one screen without scrolling sideways too much. But if you need monthly, just extend it out. The formulas and formatting all work the same, you just have more columns.
You could also do separate tabs for each week if you want to keep things cleaner. Like Sheet1 is Week 1, Sheet2 is Week 2, etc.
Protecting Cells So People Don’t Mess It Up
If you’re sharing this with your team, you probably don’t want them accidentally deleting formulas or messing up the structure. Select the cells you want people to edit (just the shift assignment cells), right-click, Format Cells, Protection tab, uncheck Locked.
Then go to Review tab, Protect Sheet, set a password if you want. Now only the unlocked cells can be edited and everything else is protected.
Wait I should mention, you gotta unlock the cells BEFORE protecting the sheet or it locks everything.
Saving As A Reusable Template
Once you’ve got it set up how you like, clear out all the shift assignments but leave the structure and formatting. Save As, and in the file type dropdown pick Excel Template instead of Excel Workbook. This creates a .xltx file that opens as a new copy every time so you’re not overwriting your template.
Or honestly just keep it as a regular workbook and do Save As with a new name each week. I do that because I can never remember where Excel saves templates.
Sharing With Your Team
You can save to OneDrive or SharePoint if you’ve got Microsoft 365 and multiple people can view it. For editing by multiple people at once you need the online version of Excel which is… fine. Not as fast as desktop Excel but it works.
Or just save as PDF and email it if people only need to view not edit. File, Export, Create PDF. Way easier than dealing with version control issues.
Quick Troubleshooting Stuff
If your dropdown lists aren’t showing up, you probably didn’t set the data validation right. Double-check that you selected the right cells and that your source list doesn’t have blank cells in it.
When formulas show as text instead of calculating, you either started with an apostrophe by accident or the cell is formatted as text. Format it as General and re-enter the formula.
Conditional formatting not working usually means your rules are conflicting or you set them on the wrong cell range. Go to Conditional Formatting, Manage Rules, and check what’s actually applied where.
Advanced Features I Sometimes Use
There’s this thing called slicers that work with tables where you can filter the schedule view. Like if you convert your range to a table (Insert tab, Table), you can add slicers to filter by employee or shift type. It’s kinda overkill for basic schedules but looks professional.
You can also link cells between sheets if you’re doing something complex. Like if you have an availability sheet and a schedule sheet, you can reference cells from one to the other. But that gets complicated fast and honestly most people don’t need it.
Pivot tables could summarize scheduling data if you’re tracking lots of historical schedules but again, probably overkill unless you’re analyzing scheduling patterns or labor costs.
The main thing is start simple, add features as you need them. I’ve seen people spend hours building these elaborate templates with macros and everything when they really just needed a basic grid with some color coding. Don’t be that person unless you genuinely enjoy that stuff, in which case go wild I guess.